
Connecting Oracle Cloud EPM Planning to Apex with Rest API: Separating Substitution Variable access by User
Did you ever want Oracle Cloud EPM Planning users to only have access to certain substitution variables that apply to their area of the business, without giving them access to all the variables for the whole application? Apex could work well as a solution to this problem.
Using Apex we can restrict the tables that use our Rest API web source modules to only show substitution variables that meet a certain criteria, for instance only pull through those from a certain Plan Type.
Our Objective
Here I will be demonstrating how to apply granular security to your Oracle Cloud EPM Planning application’s substitution variables within Apex. It will incorporate a lot from previous blog posts but I will point you toward these other posts when necessary.
Let’s Begin
We start off by creating a simple GET table that pulls through our substitution variables from Oracle Cloud EPM Planning, I covered this in an older post here. Then we want to allow for POST functionality, so we can edit these variables, details of which can be found with my two part post on the topic here and here. You may also want to duplicate the Dynamic Actions I assigned to my POST report in my Extras blog post here.
Once this is up and running and we can see and edit our substitution variables, we will then have the basis for splitting up the forms as per user defined access.
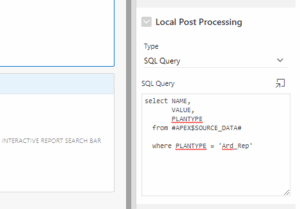
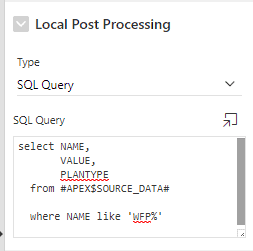
The first thing we want to do is limit the scope of these reports, we do this by adding a “Local Post Processing” SQL query. As shown below, mine limits the search for substitution variables down to those whose Plan Type is “Ard_Rep”.
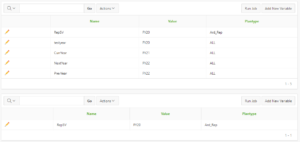
I duplicated my original report so that I can see a comparison of the two, as you can see I now have my original table with all the substitution variables available, and the one below, that only shows those from the Plan Type “Ard_Rep”.
Great so we have a table that only displays substitution variables from one Plan Type, but how do we restrict access to these tables by user?
To assign user access you will first need to create a new user to assign the access to, you can do this within the “Manage Users and Groups” page.

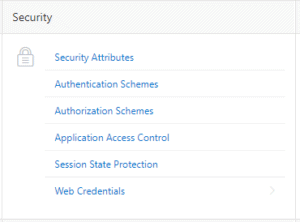
Once the users you want are set up you can then head over to “Application Access Control”.
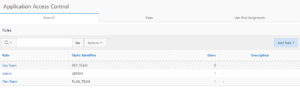
Click “Add Role” and create and name the roles you wish to make, I’ve made one for Admins, the Report Team and the Planning Team.
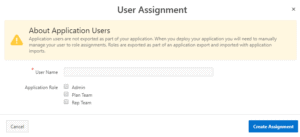
Then in the “User Role Assignments” section of that same screen, click “Add User Role Assignment” and type an active Username like one we created earlier and assign the designated Application Roles. You can assign multiple users here if required, which can be useful for providing greater access to admins or users that span multiple departments.
Then we want to head to “Authorization Schemes”, where we will want to create an Authorization scheme for each of the roles we just created, as you can see I made one for the Reporting Team and one for the Planning Team.

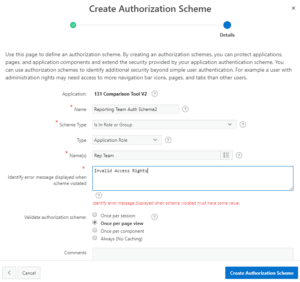
Click Create, and start “From Scratch”, give the scheme a name and select “Is In Role or Group”.
Choose type “Application Role” and provide an error message to display when the requirements are not met. Then simply assign the corresponding role to the scheme.
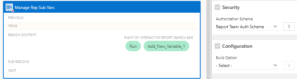
Now it is just a process of adding the Authorization scheme to the report we created earlier, making the report only visible to those users within the Authorization Scheme. i.e. to view the below report, your role must be valid with the “Report Team Auth Scheme”.
This is done in the “Security” section of the Interactive Report’s settings.
The last thing to note is that whilst they can only see the variables applicable to them, they could still use the “Add New Variable” button (which I covered in my post here) to create variables for other applications. You likely don’t want end users making entirely new substitution variables so I then simply removed the button.
But if you wanted to allow them to make new variables you could duplicate the form attached to that button and make the “PlanType” read only so they can only do so for their environment.
You also definitely want to make sure the “Name” and “PlanType” text fields are set to read only for the form that allows you to edit the variables. As this is intended for end users you don’t want them renaming or moving variables between environments.
You can even extend this logic to restrict the variables by their name, for instance as shown below, the table will only show variables with a name that begins with “WFP”, demonstrating how you can restrict access even further within the applications themselves, the only limit in customization being SQL.
It is worth noting here that while I would rather prefix my WFP variables with “WFP_” rather than just “WFP” the LIKE clause interprets an underscore as a single character. Meaning the difference between “WFP_%” and “WFP%” is only that the former needs at least one character to follow it while the latter does not, both would pick up a variable named “WFP_CurrYear”.

You should now have a report that pulls through only certain substitution variables based on the user’s defined access. This flexibility may allow admins to in future let more end users have access to their substitution variables without the risk of giving them further access to the system, or substitution variables that they have no business changing. This could work well in reducing system admin workloads by better distributing tasks down to the users that are directly affected by them.
Thanks for reading and let me know if you have any more ideas of where we can take these integrations.
Richard
You can read more of Richard’s blogs on his site HERE


 +44 (0)1483 685450
 contact us