
Unlock the power of OCI: Building a Windows VM Server from scratch in an hour
Tej Bhople
Brovanture Consultant
Introduction
Oracle Cloud Infrastructure (OCI) is a robust and feature-rich cloud platform that enables businesses to harness the power of virtualization. In this blog post, we will show you how to unlock the power of OCI through the process of building a Windows VM server on OCI from scratch. By following our step-by-step instructions, you will be able to set up your own Windows VM Server in just an hour, leveraging the full potential of OCI’s capabilities. Let’s dive in and unlock the power of OCI!
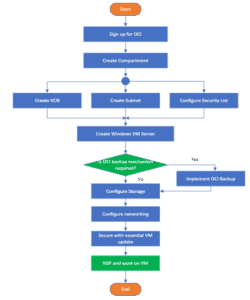
This flowchart provides a high-level overview of the steps involved:
Step 1: Sign up for OCI
To get started, sign up for an OCI account if you haven’t already. The sign-up process is quick and straightforward, and it will provide you with the necessary credentials to access OCI’s services. https://cloud.oracle.com.
Step 2: Create a compartment
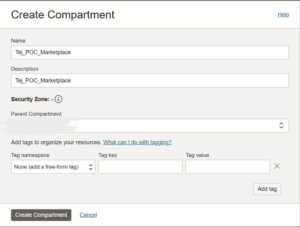
A compartment is a logical container that helps organize and isolate resources within an OCI tenancy.
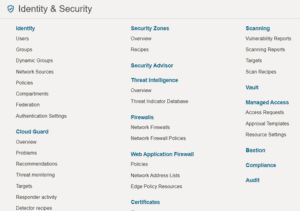
- On the OCI home page, open the navigation menu, and click Identity & Security. Under Identity, click Compartments.
A list of the compartments in your tenancy is displayed. You can choose existing compartment or create new compartment.
- Click Create Compartment.

Step 3: Create a Virtual Cloud Network (VCN)
Either we can create VCN Subnet separately or we can create them while creating VM server. I used the later option.
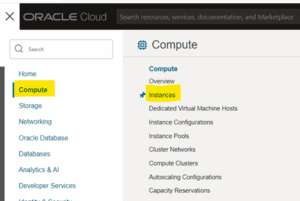
From OCI navigation menu Click on Compute and then click on Instances.
Click on Create Instance
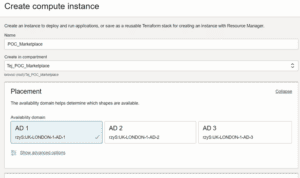
You can give a logical name to the instance and select the compartment in which you want to create the instance.
An availability domain is a standalone, independent data centre that is physically isolated from other availability domains to provide high availability. I just selected the first availability domain.
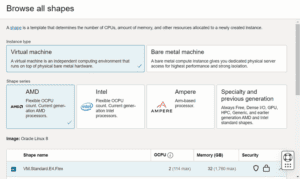
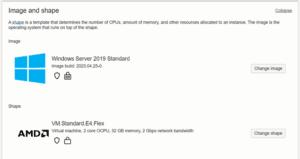
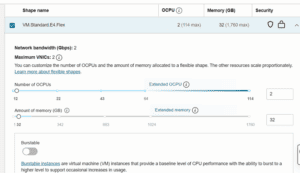
From available shapes, select the configuration of your required VM server. I have selected the minimal required for an Enterprise Performance Management (EPM) installation.
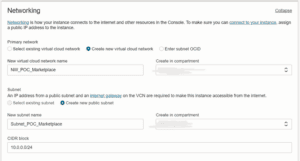
A Virtual Cloud Network (VCN) is the foundation of your network infrastructure on OCI. Create a VCN and configuring this will provide the networking resources for your Windows VM server.
Step 4: Create a Subnet Within the VCN
Create a subnet that will host your Windows VM. Specify the CIDR block for the subnet, subnet type (public or private), and choose the appropriate routing table.
Step 5: Configure Security Lists Security
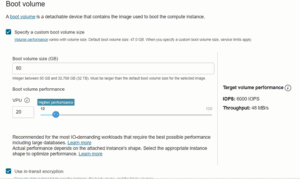
After this, you need to specify details of boot volume (C Drive of VM)
Step 6: Create a Windows VM
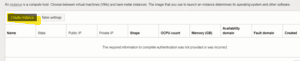
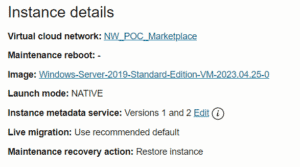
Click on Create Instance. This will take you to the instance details screen.
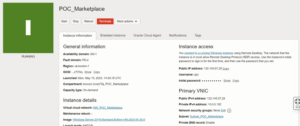
This gives us VM server with IP address mentioned as public IP address. This will allow us to connect to server using RDP.
Tried it and it failed ☹
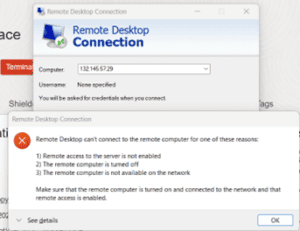
This brings us to another step 5 to configure security list. We can complete it after VCN is ready or when RDP fails 😊
We need to add our IP address to IP allowlist.
- Open the navigation menu and click Compute. Under Compute, click Instances.
- Click the instance that you’re interested in.
- Under Instance details, for Virtual cloud network, click the name of the cloud network.
- To add the rule to a network security group that the instance belongs to.
- a. Under Resources, click Network Security Groups.
- b. Click the network security group that you’re interested in.
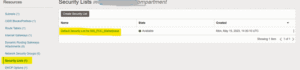
- c. Click Security lists , then click default security list
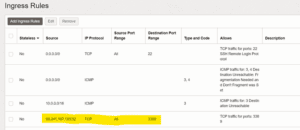
- d. Click Add Ingress Rule

- e. Click Add.
5. Return to the Instance details page: Open the navigation menu and click Compute. Under Compute, click Instances. Click the instance.
Try to connect now. Change your password on first logon and then go ahead.
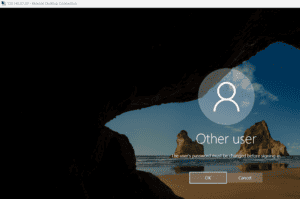
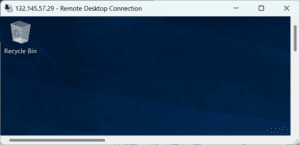
Great!, we are now connected to our OCI server.
Step 7: Configure Storage
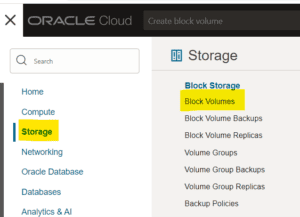
For storage, we will be creating another volume on server – similar to D drive. It is called Block volume.
- Open the navigation menu and click Storage. Under Block Storage, click Block Volumes.
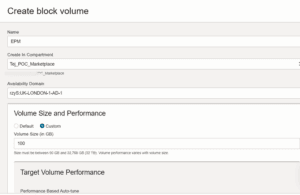
2. Click Create Block Volume.
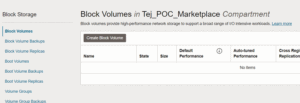
3. Fill in the required volume information:
-
- Name: A user-friendly name or description. Avoid entering confidential information.
- Domain: Must be in the same availability domainas the instance.
- Volume Size and Performance
- Size: Must be between 50 GBand 32 TB.
- Volume Performance: Optionally, you can select the appropriate performance level for your requirements.
- Backup Policy: Optionally, you can select the appropriate backup policy for your requirements
4. Click Create Block Volume.
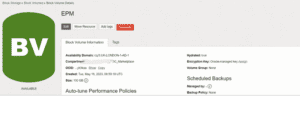
Attach this volume to Server
- Open the navigation menu and click Compute. Under Compute, click Instances.
- In the Instanceslist, click the instance that you want to attach a volume to.
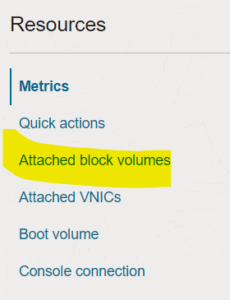
- In the Resources section, click Attached Block Volumes.
4. Click Attach Block Volume.

5. Specify the volume you want to attach to. To use the volume name, choose SELECT VOLUMEand then select the volume from the Block Volume drop-down list.
6. Select the volume attachment type, iSCSI, Paravirtualized, or Let Oracle Cloud Infrastructure choose the best attachment type. I went with iSCSI.
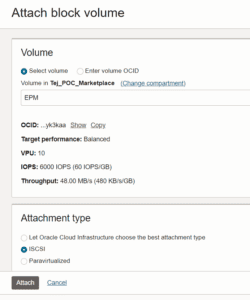
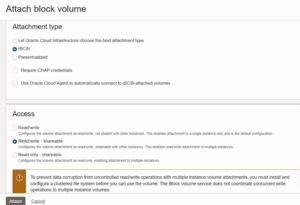
7. Click Attach.
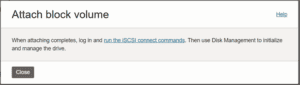
Step 8: Configure Networking
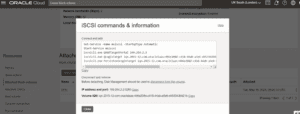
Login to server, open iSCSI initiator
Discovery tab > Discover Portal
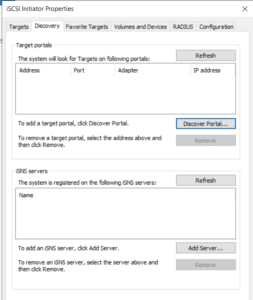
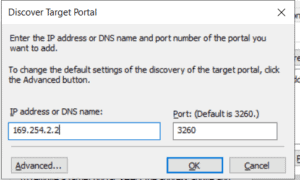
Give IP and Port of newly created Block volume. Click OK.
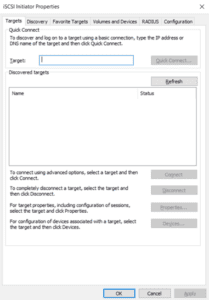
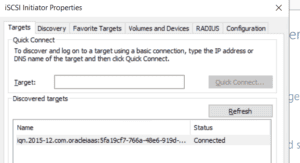
Click on Targets Tab.
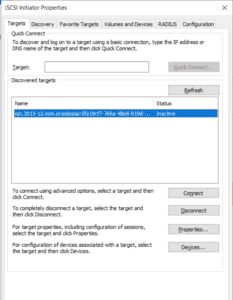
Select the block volume and click connect. It shows connected.
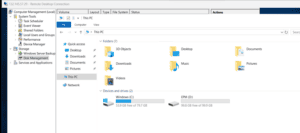
Go to computer management
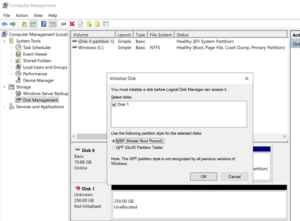
Step 9: Secure with essential VM update
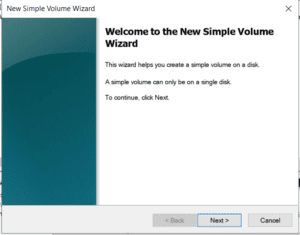
Right click on Disk 1, new simple volume
And our server is ready. I am going to use it for EPM. Maybe you are aware of it from naming conventions 😊
Until next time
Tej


 +44 (0)1483 685450
 contact us