
Connecting Oracle Cloud EPM Planning to Apex with Rest API: Running Jobs from Apex Part 2 of 2
In Part 1 I covered how to setup your web source modules, one to perform a GET request on available jobs, and another to perform a POST request to run these jobs. Now let’s build the connection from the web source modules connecting Oracle Cloud EPM Planning application.
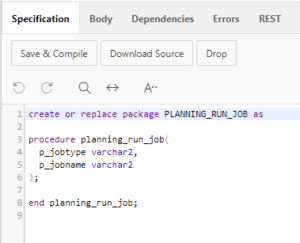
Head over to SQL Workshop and create a new Package with the following “Specification” and “Body”, substituting “PLANNING_RUN_JOB” with the name you gave your Package.
Or as text:
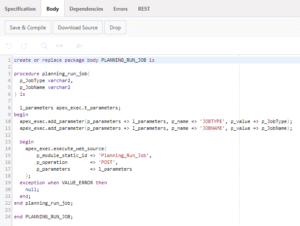
Body:
create or replace package PLANNING_RUN_JOB as
procedure planning_run_job(
p_jobtype varchar2,
p_jobname varchar2
);
end planning_run_job;
———————-
Specification:
create or replace package body PLANNING_RUN_JOB is
procedure planning_run_job(
p_JobType varchar2,
p_JobName varchar2
) is
l_parameters apex_exec.t_parameters;
begin
apex_exec.add_parameter(p_parameters => l_parameters, p_name => ‘JOBTYPE’, p_value => p_JobType);
apex_exec.add_parameter(p_parameters => l_parameters, p_name => ‘JOBNAME’, p_value => p_JobName);
begin
apex_exec.execute_web_source(
p_module_static_id => ‘Planning_Run_Job’,
p_operation => ‘POST’,
p_parameters => l_parameters
);
exception when VALUE_ERROR then
null;
end;
end planning_run_job;
end PLANNING_RUN_JOB;
————————————
Much like the package I made in my other post where we posted changes in substitution variables back to Oracle Cloud EPM Planning this is the artifact that our application will reference and allow it to communicate directly with our web source module.
Once this is complete, and the package is saved and compiled without error, we can move on to adjusting our application directly.
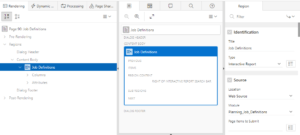
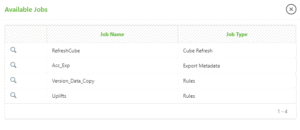
The first step is creating the report that pulls through the list of available jobs, to do this make a new interactive report, and under “Location” select “Web Source” and under “Module” choose the GET web module you created earlier, the one I named “Planning_Job_Definitions”.
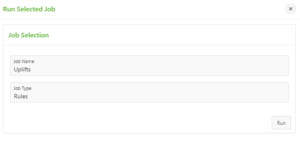
Then we need to create a new blank modal dialog page, creating a “Static Content” region, containing two “Text Fields”: JobName and JobType, as well as a “Run Job” button that submits the page.
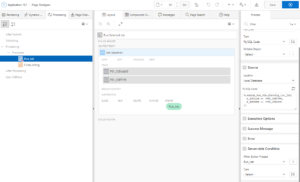
From here we head to the “Processing” tab and create a process with the type “PL/SQL Code”, we then want to insert the below code into our “PL/SQL Code” source, with the second value matching the name of the text field on your page, as well as adding a server side condition of when the button you created is pressed.
Notice than I’m now referencing the package we created that uses the POST Web Source Module, while the Interactive Report we made earlier only references the GET Web Source Module.
PLANNING_RUN_JOB.planning_run_job(
p_jobtype => :P91_JOBTYPE,
p_jobname => :P91_JOBNAME
);
This “PL/SQL Code” is simply pulling the p_name etc variables from the “PLANNING_RUN_JOB” package we created earlier and assigning the values from the applicable text fields to them.
I also added another process here to “Close Dialog” on the same button press.
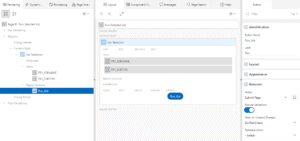
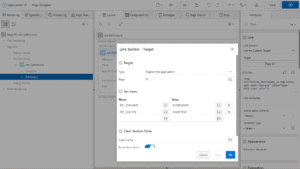
From here all that’s left to do is link this modal dialog with the interactive report we made earlier. To do this we simply head back to our Interactive Report’s attributes, selecting “Link to Custom Target”, selecting the page we just created as the target and assigning the corresponding values between the pages as shown below. (I’ve hidden the “Links” column and not linked this to the form as it isn’t necessary for this exercise.)
Now this should all work! If you go to this report page and go to edit the job, it will take you to your new modal dialog, allowing you to submit that page thus pushing the POST request through to Oracle Cloud EPM Planning, so you should now be able to submit Jobs straight from APEX.
You may want to change the icons for the rows, like I have above, as it doesn’t really make sense for it to be a pencil as we’re not editing the job but all these peripherals can be edited to best suit your uses.
I hope this information connecting Oracle Cloud EPM proves useful to you and let me know (via our contact page) if you can think of any further integration we could build between these two systems!
Thank you for reading.
Richard
You can read many other useful Oracle Cloud EPM and NetSuite ERP blogs posted by my colleagues at Brovanture here


 +44 (0)1483 685450
 contact us