Creating an Infolet in Oracle FCCS
Sarah Dow
Brovanture Consultant
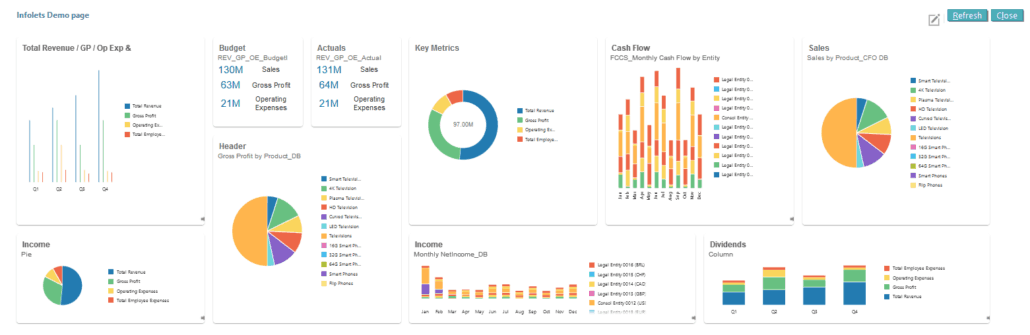
Oracle FCCS Infolets are a way to display key high-level static information that’s essential for managing your business – an example is above.
An infolet is made up of a series of boxes which you link to a data form – they contain key information such as Sales, GM and Operating Expenses. The box can only display the static data included in the data form, these are used more as a quick reference to key information to help you manage your business.
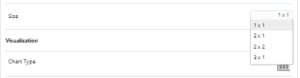
Each infolet can display up to 10 boxes, each box is linked to a data form and can be sized as 1×1, 2×1, 3×1 & 2×2 Note 1×1 refers to the box size that spans one row and one column width = 170 pixels. You can choose to represent the data as text boxes size 1×1 or graphical and there are various chart options available – bar chart, doughnuts & pie charts etc.
Before creating your infolet in FCCS, I suggest designing the layout for your infolet page in Excel. Scope the order and content for each box along with the required box size, options available 1×1, 2×1, 3×1 & 2×2 Note 1×1 refers to the box size that spans one row and one column width = 170 pixels). Data forms will then need to be created to hold the content you wish to display in each box.
Once you have done this, you are ready to create your infolet.
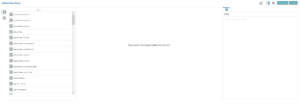
Select the Infoletscard 
Then select the Create ![]()
This will open the Infolets designer page, as shown in the below screenshot
Select the add box icon ![]() , this will add a 1×1 sample box to your infolet page.
, this will add a 1×1 sample box to your infolet page.
The Infolet properties tool bar on the right panel allows you to customise your box
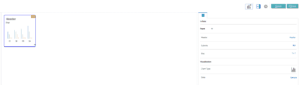
- First click into the header box and give your box a title.
- Next, add your Subtitle if required.
- Select the desired size for your box from the drop-down menu, for this example I’m selecting a 2×2.
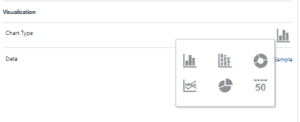
- Next select a chart type from the drop-down menu, I’m selecting a column format.
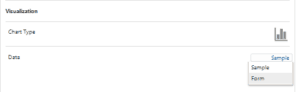
- You will then need to link the box with a data form that holds the content you wish to display, select Form from the Data drop-down menu.
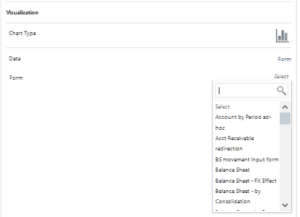
- This will then enable the data form selection drop-down menu, highlight the desired data form to select.
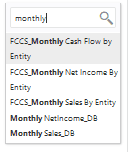
- You have the ability to search for the required form, for this example I’m selecting Monthly NetIncome_DB data form, and I can search by simply typing Monthly.
- This will then populate the box with the content in the data form as shown below.
- Give your Infolet a name by, clicking in the top left-hand box and inputting your infolet name, then click Save

- You can preview the content to check progress from within the designer page by selecting the settings cog and choosing runtime.

- Repeat the above steps to add a further 9 boxes if desired and then click Save.
- To View the finished article, close the designer and click on your infolet name


 +44 (0)1483 685450
 contact us